Creating and Using Templates
Templates allow you to standardize how your organization keeps track of information on Benchling. Templates are preformatted notebook entries. By creating templates for particular protocols or processes, members of your organization can easily input relevant data without having to worry about formatting. Once templates have been defined, users can easily create new entries from templates.

Templates are organized in groupings called Template Collections. You can define which organizations and other users have read or write access to each of these collections.
Setting up Templates
Creating new Template Collections
-
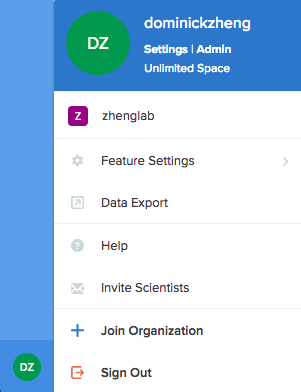
Click on your profile icon on the bottom left corner of the interface. Then click the name of the organization you would like to create a template for.
-
Click View Templates to access your Template Collections.

-
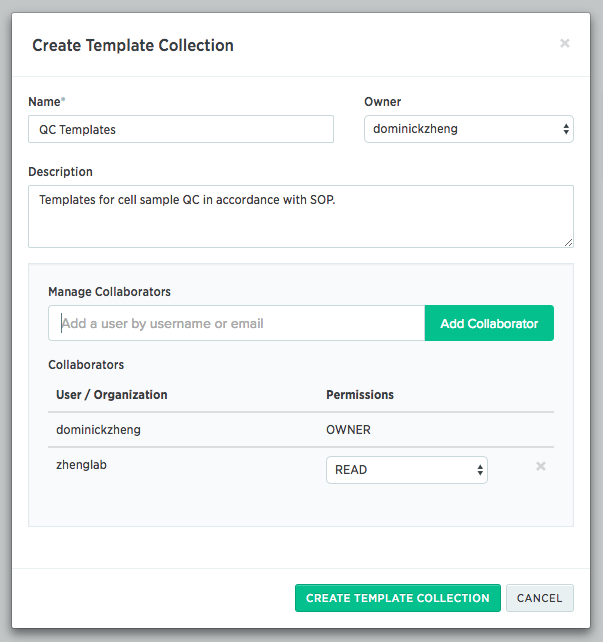
Click + New Collection to open a pop-up box from which you can specify the Template Collection’s name, owner, description, and permissions settings.
-
Click the green Create Template Collection button to create the new collection.
Creating new Templates
-
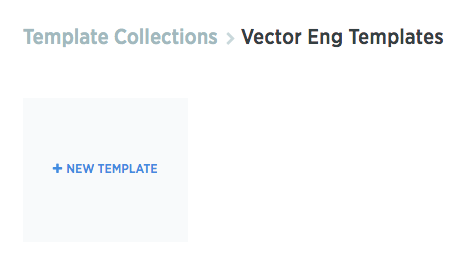
Navigate to the Template Collection you’d like to create a new template for. Then click + New Template.
-
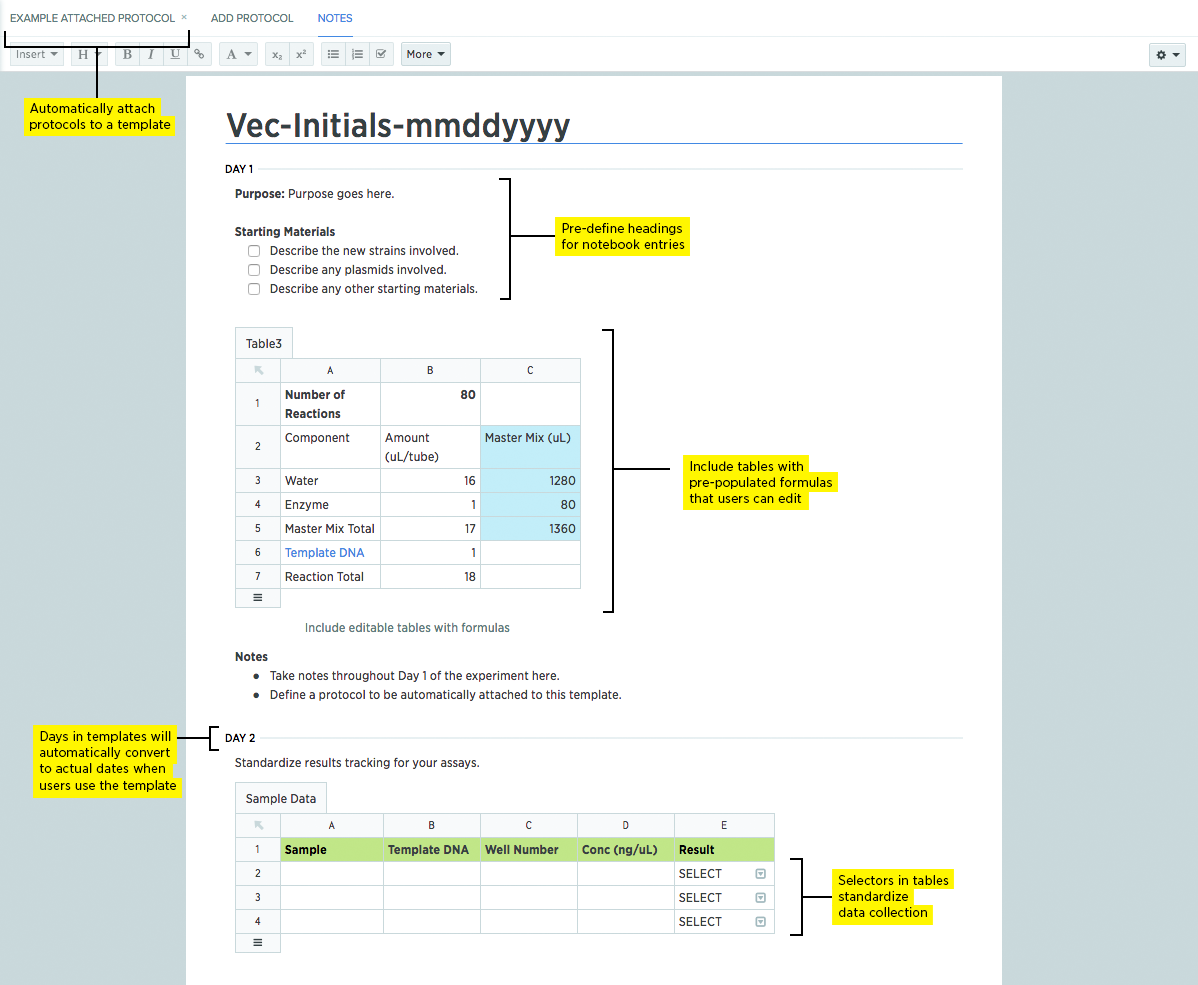
Format the notebook entry and add any relevant protocols. Basic information on formatting can be found in our Notebook tutorials.
-
Tip: Adding dates by selecting Insert > New Day will add numbered days (Day 1, Day 2, etc.) instead of actual calendar dates. The day number can be set by clicking on each new day header. When users create entries from a template, these generic day numbers will be automatically updated based on whatever the user sets as the entry’s initial date.
-
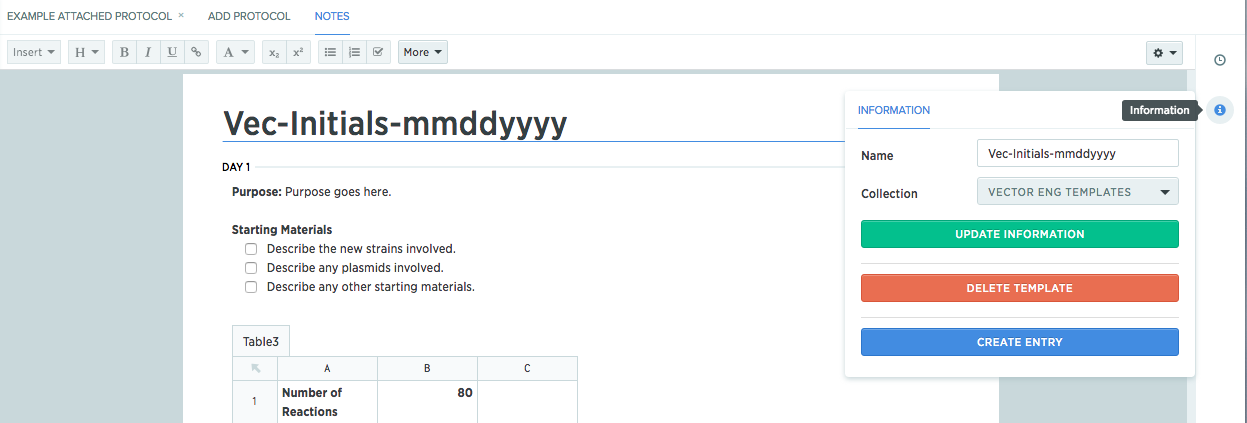
When finished with formatting, click the “Information” icon on the right panel and select Update Information to update the template.
Using Templates
-
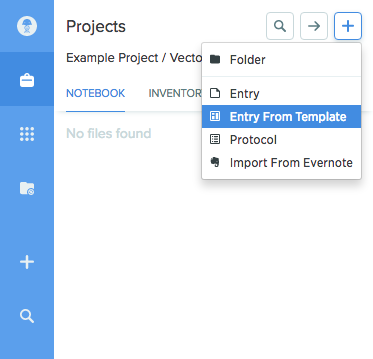
Navigate to the project notebook that you’d like to a create a new entry from a template in. Click the “Create” button (a plus sign) and select Entry From Template.
-
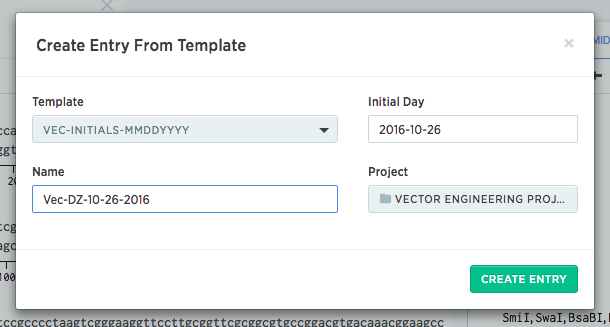
In the pop-up box, select the template you’d like to use. Provide a name for the new entry, an initial date, and the location it should be set in.
-
Click Create Entry.